As the Roubo progresses from bench to workbench – maybe it’s a fine distinction, but I think it’s valid – I’ve started to think of it as the Roubo du Garage. It’s smaller than standard (about 23″ x 60″), and has some compromises. But since its function is workholding, I decided that the one place I would not compromise is in the quality of the workholding hardware. It was an indulgence, and a fun one.
That’s not to say it’s all modern. Both of the vises are very new designs, and one is as close to top-of-the-line as it comes. But the most important part of the workholding is the (very) old system of holdfasts and dog holes. There’s been a world of information written about holdfasts the past few years, some of which seems contradictory, some very straightforward.
The lessons that came out of this part of the project weren’t what I expected, and included a mix of what-to-do and what-not-to do; of good design and poor; document writing both good and bad, and some really good customer service from a small company. The bench became a mix of old tool designs and new ones. I love the outcome, but it’s like the contrast between my chisels and my iPad (more on the iPad as an indispensable shop tool in the future). 
Now that the bench itself was built and standing, I flattened the top with the help of a new/old Stanley #40 scrub plane. This comes under the heading of “why didn’t I get one of these years ago”. It hogs wood off in neat little curls faster than you’d believe. It took no – ZERO – time to learn, seconds to set, and evened up the top enough for my jointer plane in a few minutes. 
Sighting for flattening the top is accomplished with two parallel sticks called winding sticks. Each is a different color, and you lay them across the top and sight across them to see twist in the wood. Yes, it’s that easy. No, you won’t see pictures of mine here… they’re just spray-painted angle aluminum. When I have time to make a set out of mesquite and maple, then I’ll post them. If you’re interested in this technique, Google “winding sticks”, or read this excellent article from Fine Woodworking. Or buy Chris Schwarz’s book (visible on my iPad). Or almost any other book about traditional woodworking. 
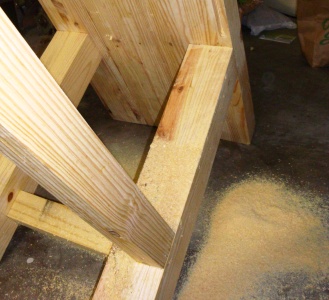
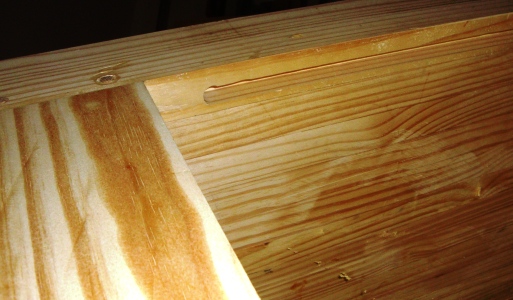
I must have read the section about the Roubo in this excellent book a dozen times. Including the part about routing a groove in the underside of the top for the sliding deadman before assembling it. Of course, I didn’t. The solution was five minutes with a palm router, and that crisis was averted. The slot didn’t go all the way to the right front leg, but a few minutes with a chisel fixed that. 
Part 1: The Benchcrafted Glide Vise
This was a piece of engineering I loved from the moment I saw the pictures. A heavy face vise, with the weight fully supported by two rollers – one above the parallel guide, and one below. I watched a video of one being gently spun open and closed. And I was hooked.
The first thing I’ll say about the company is this: They told me eight weeks. I had it in three.
When I unwrapped the parts, I was really, really impressed at the quality of construction and the beauty of the product. When I downloaded the instructions from their website, well… that’s when the qualms started. The instructions are twenty-seven pages long. Fully illustrated. Some of the hardware required cutting threaded holes in the table with taps. It also sat in its box for three months while I recovered from my shoulder surgery. It kind of hung on the horizon, and intimidated me from a distance. 
I decided that I’d make the assorted workholding pieces (the chop and parallel guide, tail vise, deadman, and planing stop) out of mesquite. I have a love/hate relationship with it. I love the way it looks, the weight, and the way it handles when it cooperates. I hate how it dulls tools and can be difficult to work. But I made the drive up to Woods of Mission Timber, and spent some time sorting out the pieces I wanted – including 8/4 stock for the vises.
The piece I selected has some small cracks that don’t go very deep, and won’t compromise the strength of the chop. It also had a large-ish knot about halfway through the thickness. For decorative work, I usually fill mesquite flaws with powdered copper and epoxy; for this, I decided on epoxy and some black ink – making a solid, polished black fill.
After cutting the shape of the chop, I pried the knot out and mixed the epoxy. The knot came down the side of the chop about halfway, so I stuck some blue painter’s tape on the side to keep it from spilling out. I poured the epoxy in and let it set. Interesting lesson: epoxy gets hot when it cures. The more you use, the hotter it gets. This was about a quarter of a cup, and was too hot to touch for quite a while.
Once it set, I pulled the tap, ran a router around the edge of the chop to make the chamfered edge, and scraped the excess epoxy off with a card scraper. It sands and polishes right along with the wood.
The parallel guide was cut with a simple tenon on one end, and a matching mortise cut into the chop at the bottom. 3/8″ holes are drilled along the length to insert a pin to keep the chop of the vise from racking unevenly when tightened. The parallel guide was locked in place with drawbored pins of rived white oak. I noticed after it was finished (too late) that it’s slightly out of square with the chop… just a couple of degrees, not enough to make any difference to the operation of the vise, but enough to annoy me because I know it’s there.
The wheel and screw are mounted to the vise with machine screws into threaded holes. I’ve tapped threads into metal in the past, but not into wood – and I was a little skeptical. No longer. It’s much easier than tapping into metal, and holds extremely well. There’s no need to tap the holes a quarter-turn at a time – drill the pilot hole, attach the tap to a hand drill, and let the tap feed itself. Backing out the tap three or four times through the depth of the hole was sufficient to keep the threads clear of chips. Two things, here – first, put no pressure on the tap; just let it thread itself. Hold the drill loosely, and let the tap do its work. Second, don’t let it hit bottom – it will dig in and spin, and strip the threads out. Know when to stop.
The rollers are easy to make with a bandsaw.  Templates are available on the Benchcrafted website, and can be printed and stuck to the blanks. Cutting and assembling them is short work. The longest part is drilling out and shaping the slots for the mounting bolts.
The process of mounting the rollers, the vise, and the acetal bearing the screw rides on is exacting, but not difficult if you follow the instructions carefully. Which is the second thing I’ll say about Benchcrafted: they know how to write instructions. I’ve done a lot of technical writing, and their instructions are clear, concise, accurate, and have useful information about places you might get into trouble. The instructions were perfectly and completely accurate in every respect.
At first, I had some difficulty adjusting the height of the rear roller bearing… or so I thought. As it turned out, I had the slot for the parallel guide a little too tight, and it was trying to drag slightly. A few minutes with a rasp cleaned out the high spot, and it worked perfectly. It functions exactly as described – which is high praise. It spins freely and grabs tight.
The hardware comes with a 3/8″ rolled steel pin to make make the locking pin for the parallel guide. All you have to do is make a handle. Or, better yet – I decided to use that Crown burnisher I recently decided that I really hated and threw into a junk drawer. It makes the perfect $19.95 parallel guide pin. And I laugh every time I look at it. 
It wasn’t the simplest assembly I’ve ever done, but it worked great and I love the results. I wound up using it to finish some of the remaining work on the bench, and it works better and smoother than any vise I’ve ever used. It’s exactly as good as the company – and the reviewers – have said. Not many new devices seem to live up to that.
This is the first of two vises… and the other story isn’t quite as pleasant. Stay tuned.
Oh, before I forget: music was Greg Howard’s Stick Figures, and Rob Martino’s One Cloud – both music for the Chapman Stick. Great albums, both of them.
Ross Henton


